 Kawasaki Z1000SX - Service manual > Upper Fairing Removal
- Remove:
Lower Fairing (see Lower Fairing Removal)
Windshield (see Windshield Removal)
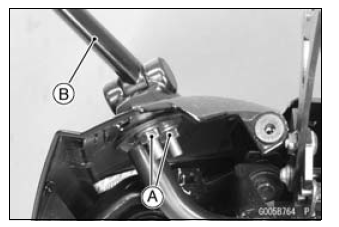
Bolts [A] with Washers
Meter Cover [B]

- Remove:
Bolts [A] with Washers
Windshield Bracket Cover [B]

- Remove:
Nuts [A] (Both Sides)
Rear View Mirror [B] (Both Sides)

- Remove:
Bolt [A] (Both Sides)
Clamp [B] (Left Side only)

- Disconnect:
Headlight Lead Connectors [A]
City Light Lead Connectors [B] - Remove the upper fairing with the headlight.

Upper Fairing Installation
- Installation is the reverse of removal.
Upper Fairing Disassembly
- Remove:
Upper Fairing (see Upper Fairing Removal)
Screws [A]
Clamp [B]
Headlights [C]

- Remove:
Screw [A] - Separate the upper fairing.

Upper Fairing Assembly
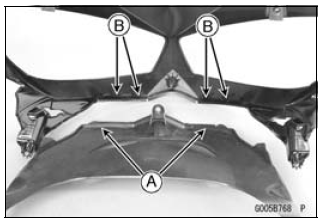
- Fit the projections [A] into the slots [B].

Windshield Bracket Disassembly
- Remove:
Upper Fairing (see Upper Fairing Removal)
Meter Unit (see Meter Unit Removal in the Electrical System chapter) - Remove the springs [A].

- Remove:
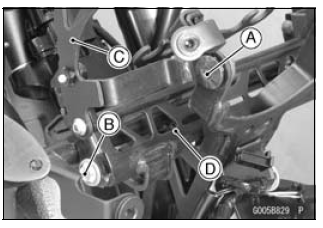
Stay Assembly Mounting Bolt [A] and Collars (Both Sides)
Bolt [B], Damper, Collar and Washers (Both Sides)
Stay Assembly [C]
Adjust Knob Assembly [D]

- Remove:
Bolts [A]
Adjust Knob [B]
Adjust Knob Bracket [C]

- Remove:
Bolts [A]
Stay Shaft [B]
Lower Stays [C]
Upper Stays [D]
Stoppers [E]

Windshield Bracket Assembly
- Confirm that the upper fairing bracket has been firmly installed by the mounting bolts [A].

- Assemble the adjust knob assembly as shown in the figure.
Adjust Knob Bracket [A]
Adjust Knob [B]
Bolts [C]

- Apply a non-permanent locking agent to the threads of the stay shaft mounting bolts [A].
- Assemble the stay assembly as shown in the figure.
Upper Stay [B]
Stopper [C]
Stay Shaft [D]
Stay Shaft Mounting Bolts
Stopper Mounting Bolts [E]- Do not tighten firmly the stopper mounting bolts at this time.

- Apply grease to the dampers [A] and washers [B].
- Apply a non-permanent locking agent to the threads of the adjust knob assembly bolts [C].
- Install:
Adjust Knob Assembly [D]
Washers
Dampers
Collars [E]

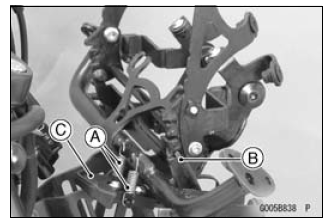
- Install the stay assembly [A].
- Fit the pis [B] of the adjust knob assembly into the grooves [C] of the stopper (Both Sides).

- Install:
Stay Assembly Mounting Bolts [A] and Collars - Tighten the following bolts while the pins fit in the stoppers.
Torque -
Stay Assembly Mounting Bolts: 6.9 N*m (0.70 kgf*m, 61 in*lb)
Stopper Mounting Bolts [B]: 4.2 N*m (0.42 kgf*m, 37 in*lb)

- Install:
Lower Stay [A]
Bolts [B]

- Install:
Springs [A] - Confirm that the position of the windshield stoppers [B] change smoothly
and surely.
- Push the adjust knob [C] and change the positions of the windshield stoppers.
If the windshield stoppers do not move smoothly reassemble the windshield bracket.

Windshield Bracket Assembly Removal
- Remove:
Upper Fairing (see Upper Fairing Assembly Removal)
Meter Unit (see Meter Unit Removal in the Electrical System chapter)
Horn Lead Connectors [A]
Turn Signal Relay [B]
Clamp [C] (Main Harness)
Bolt [D]

- Remove:
Bolts [A]
Windshield Bracket Assembly [B]

Windshield Bracket Assembly Installation
- Installation is the reverse of removal, note the following.
- Run the cables and leads correctly (see Cable, Wire, and Hose Routing section in the Appendix chapter).
See also:
 Kawasaki Z1000SX - Service manual > Lower Fairing Disassembly
Remove: Lower Fairing (see Lower Fairing Removal) Screws [A] Lower Fairing Lower [B] Remove: Quick Rivet [A] Screws [B] Inner Fairing [C] Remove: Screws [A] Slat Fairing [B] Lower Fairing Upper [C]
 Kawasaki Z1000SX - Service manual > Side/Seat Covers
Side Covers Side Cover Removal Remove: Lower Fairing (see Lower Fairing Removal) Bolts [A] with Washers Pull the side cover [B] outward to clear the stoppers [C].
 Rider's Manual BMW R 1250 GS GSA
 Owner's Manual Harley-Davidson Sportster XL1200X Forty-Eight
 Owner's Manual Honda CBR650R
 Service manual Honda CBR650
 Owner's Manual Honda PCX125
 Owner's Manual Kawasaki Z1000SX
 Service manual Kawasaki Z1000SX
 Owner's Manual Lexmoto Echo
 Owner's Manual Royal Enfield Interceptor 650
 Service manual Royal Enfield Interceptor 650
 Owner's Manual Yamaha MT-07